Connect


Yearly Archives: 2018
Spring Dresses under $100
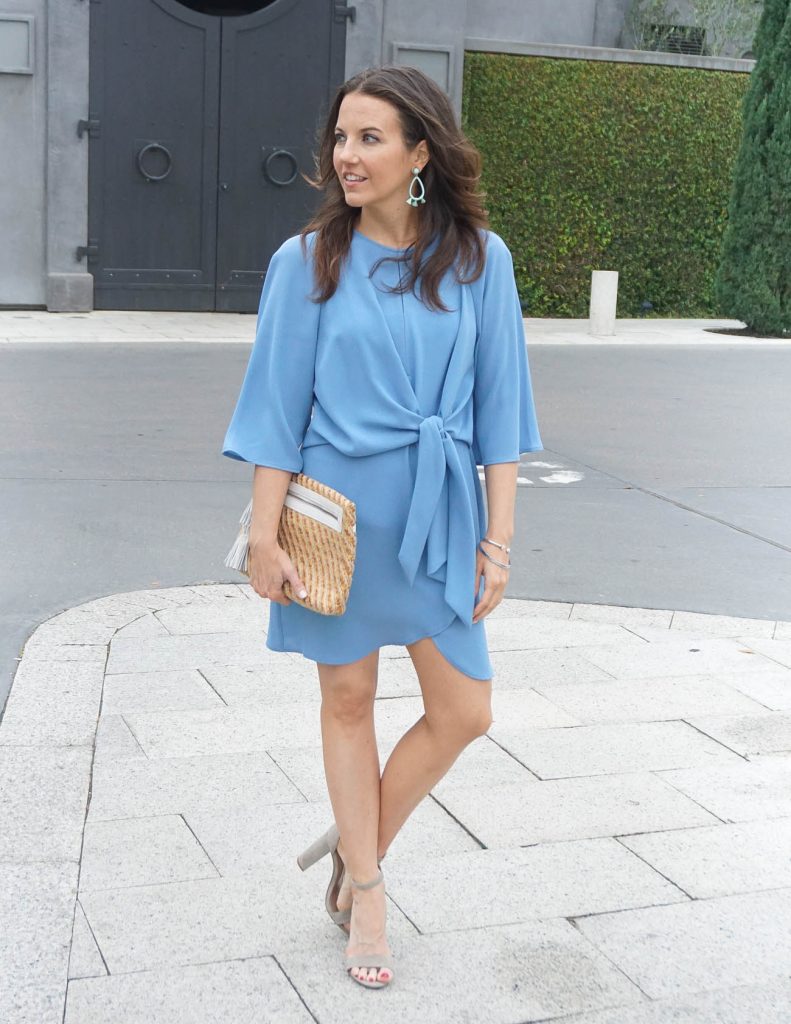
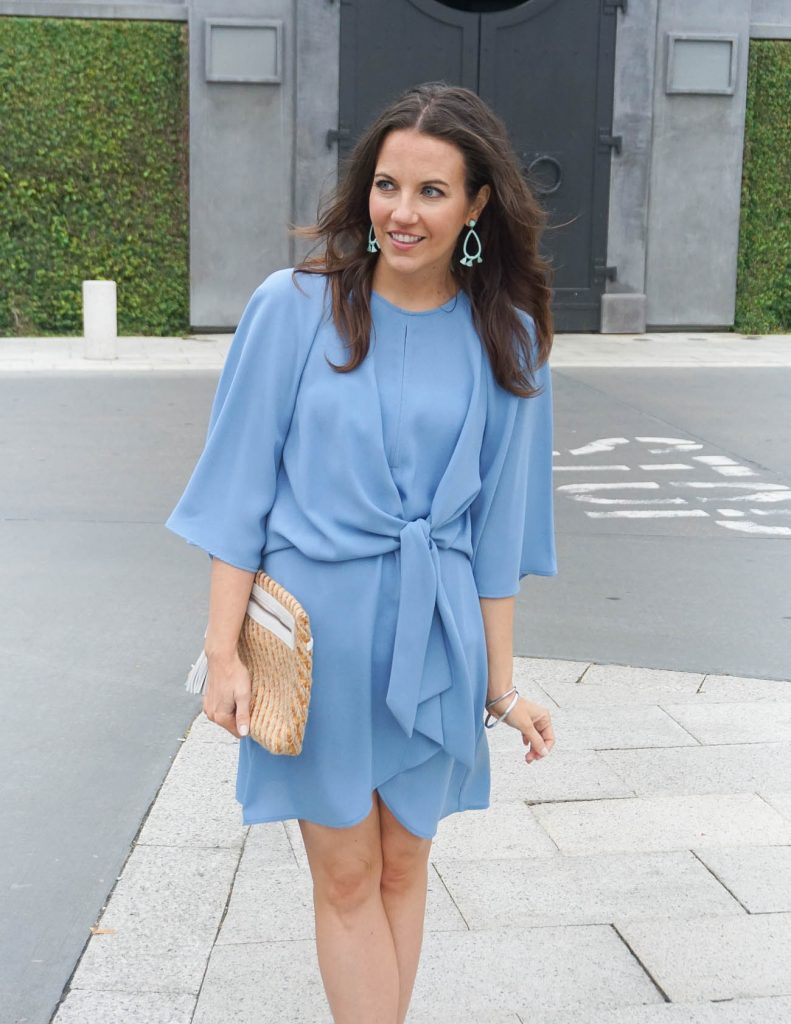
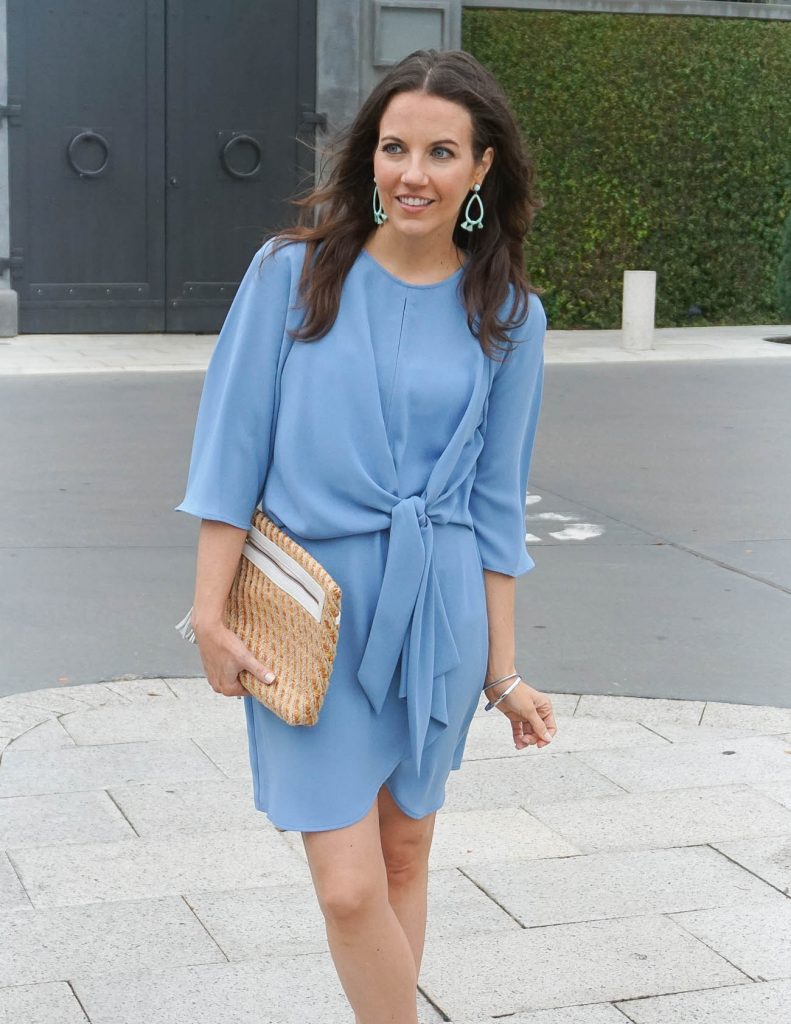
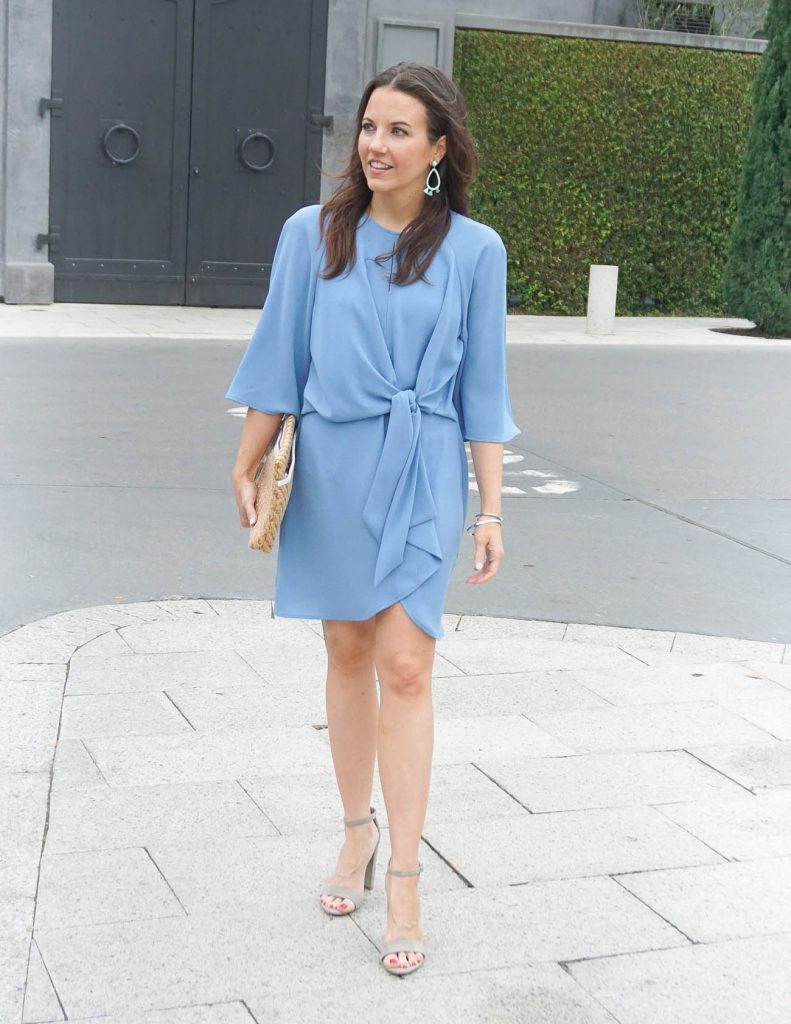
Happy First Day of Spring! I cannot think of a more perfect way to celebrate than with this gorgeous light blue dress AND a round up of my favorite 2o Spring dresses under $100! I am a huge fan of Spring for many reasons. The big non-fashion ones – 1) all the flowers are blooming and 2) the feeling of fresh starts and new beginnings. I feel like everything from plants, people, and social calendars are all start coming back to life with the start of Spring.
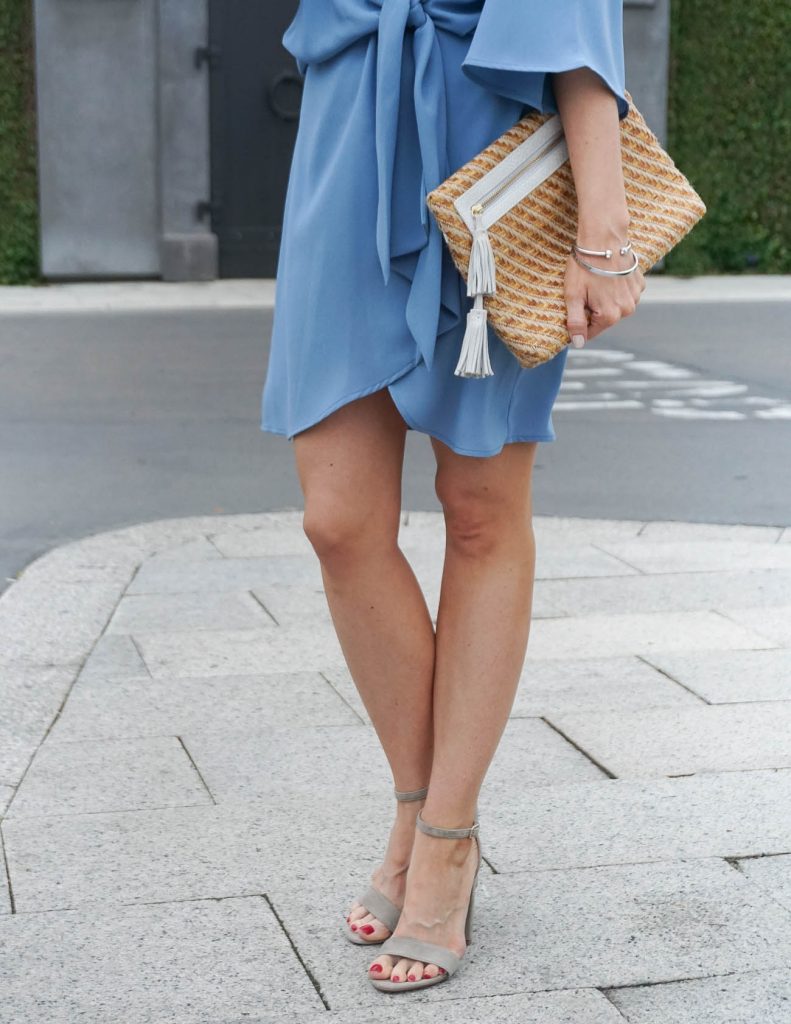
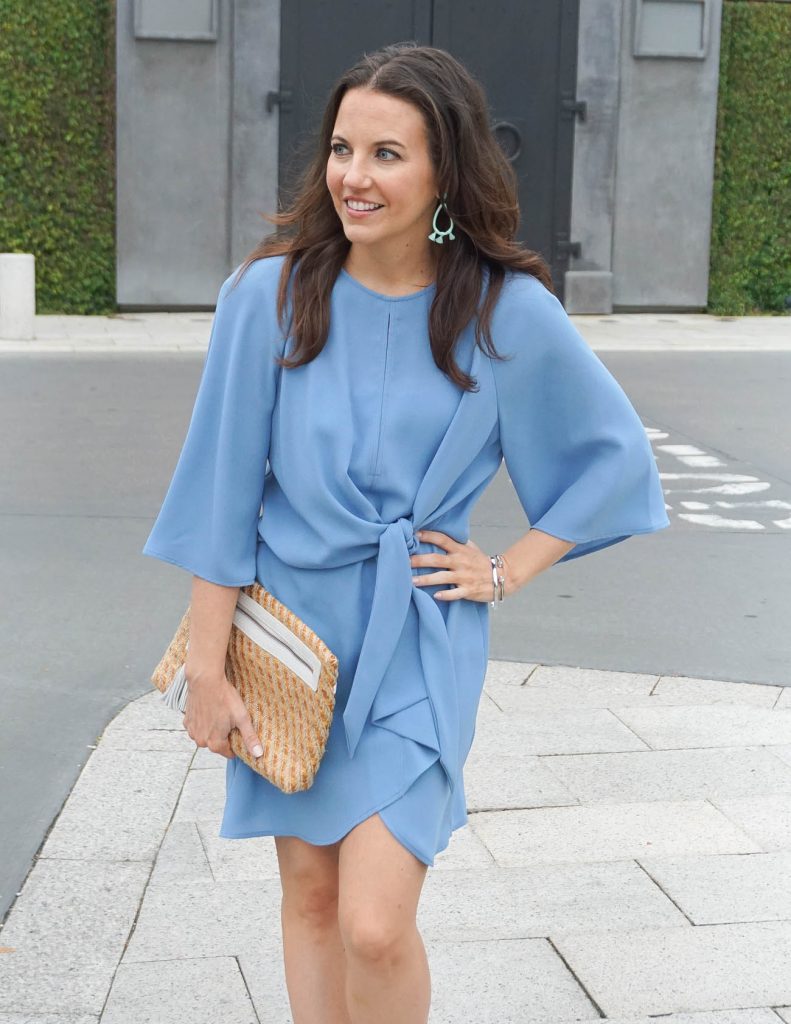
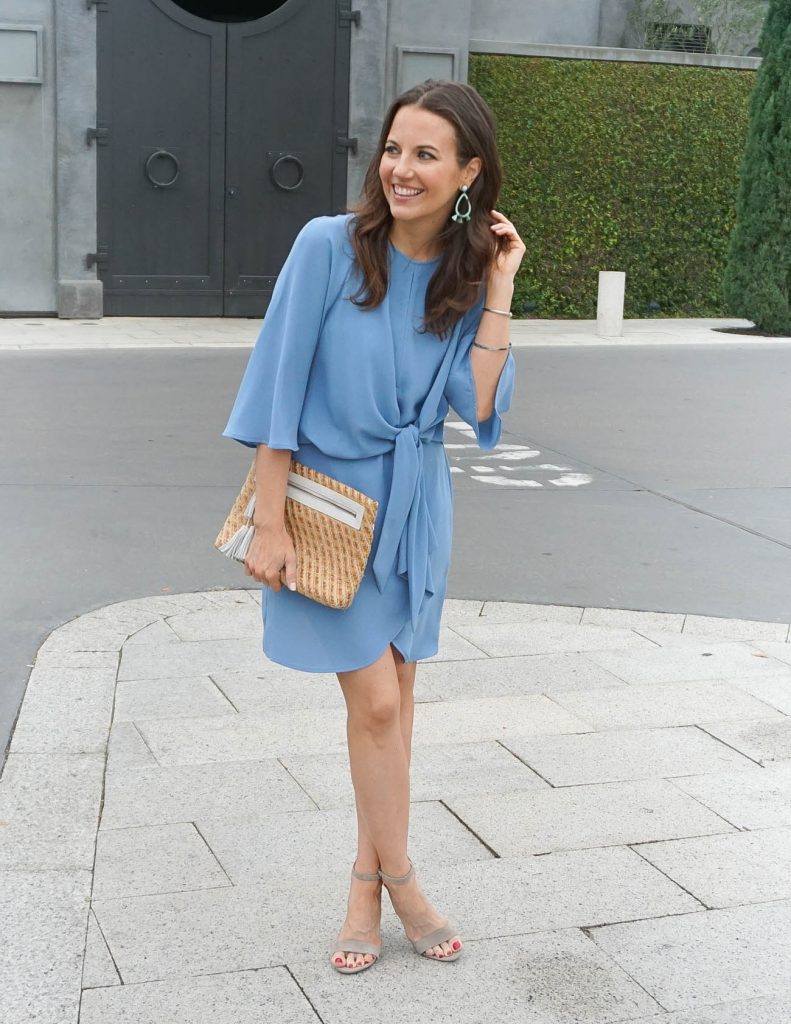
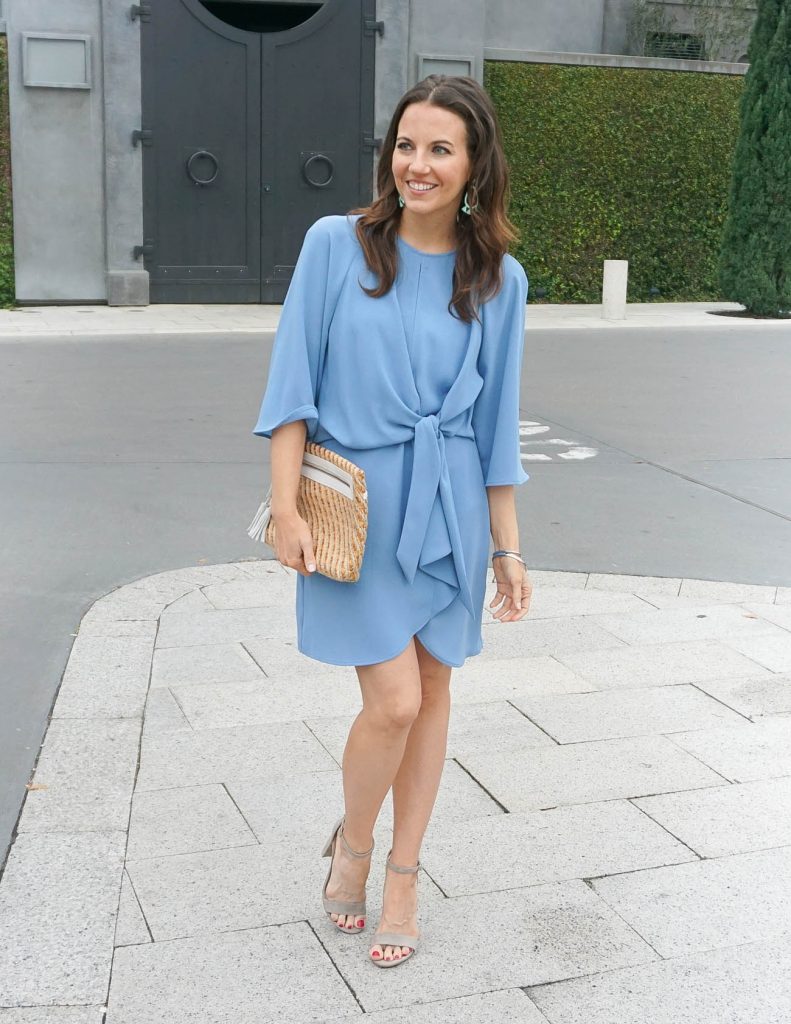
The Spring season has me on the biggest dress kick right now. I’m warning you, the rest of March and most of April is going to be real dress heavy, but they will all be really pretty.  I love this little light blue number for Easter, date night, a baby/bridal shower, or a fancy Sunday Brunch. It’s Topshop which is European fit and sizing, so you definitely want to size up. I’m wearing a US6, and I normally wear a 4 in dresses.
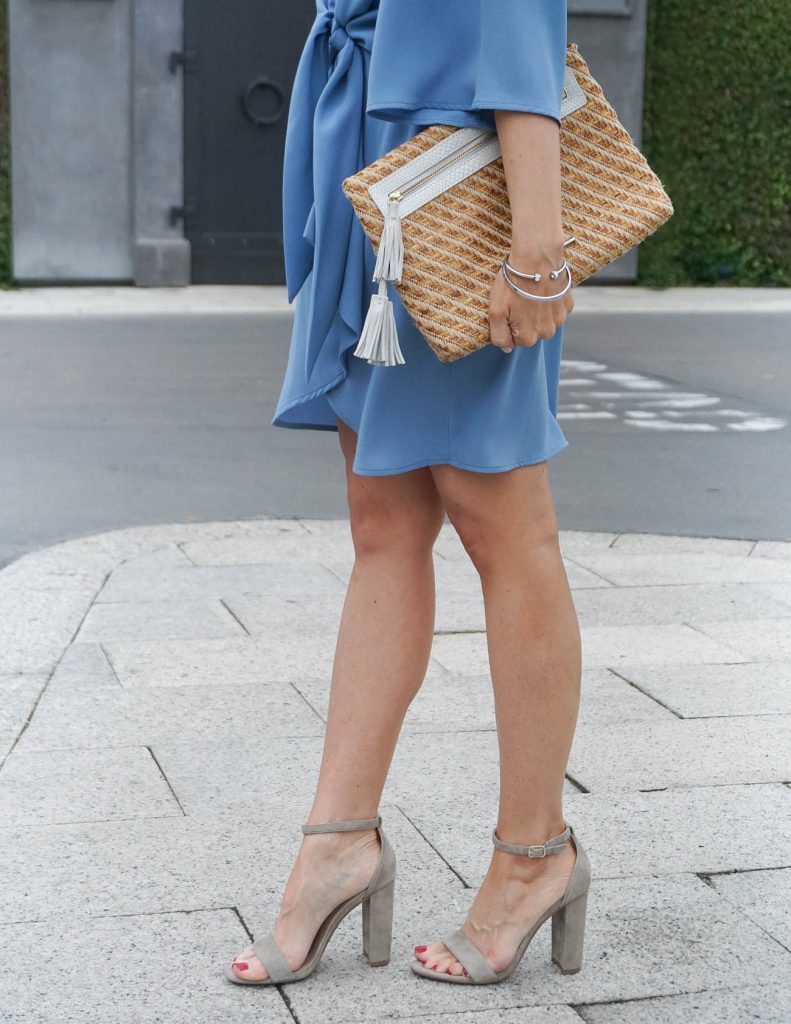
Ya’ll these sandals that I love finally came back in stock in my size in the taupe color. I have never added to cart so fast!! I predict to wear these and my black pair on major repeat all spring and summer. I mean they are the most comfortable heels I own after all.
I also rounded up 20 of my favorite Spring dresses under $100. If I let myself keep browsing, I probably would have ended up closer to 100 under 100. Stay tuned to my Spring Style Finds for more picks throughout the season. The dresses below are a good mix of casual, work, date night, and wedding season. I wanted to be sure to hit ALL the events you might have coming up this spring.
I hope ya’ll enjoy the first day of Spring and have a beautiful season ahead!
| OUTFIT DETAILS |
Light Blue Front Tie Dress | Taupe Block Heel Sandals | c/o Elaine Turner clutch (old, currently crushing on this one!) | c/o Mint Earrings | Kate Spade Bangle | Cuff Bangle | Nails: Essie Limo-Scene
MORE SPRING DRESSES UNDER $100
SHOP THE LOOK


What to Wear with White Shorts

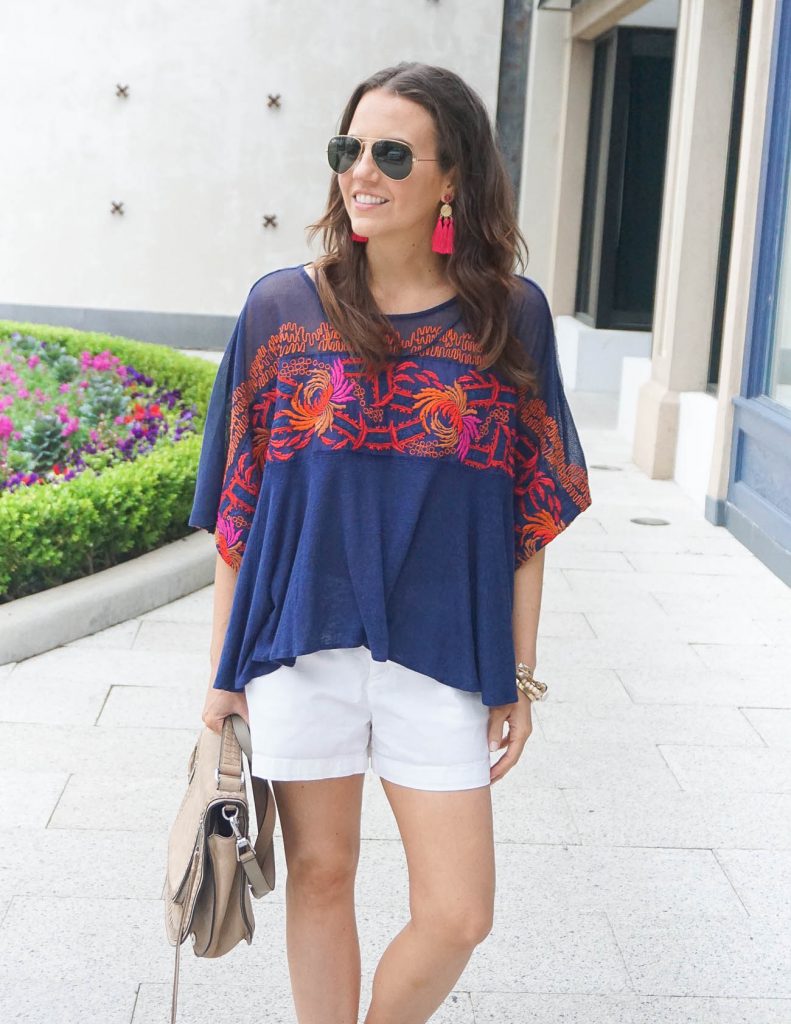

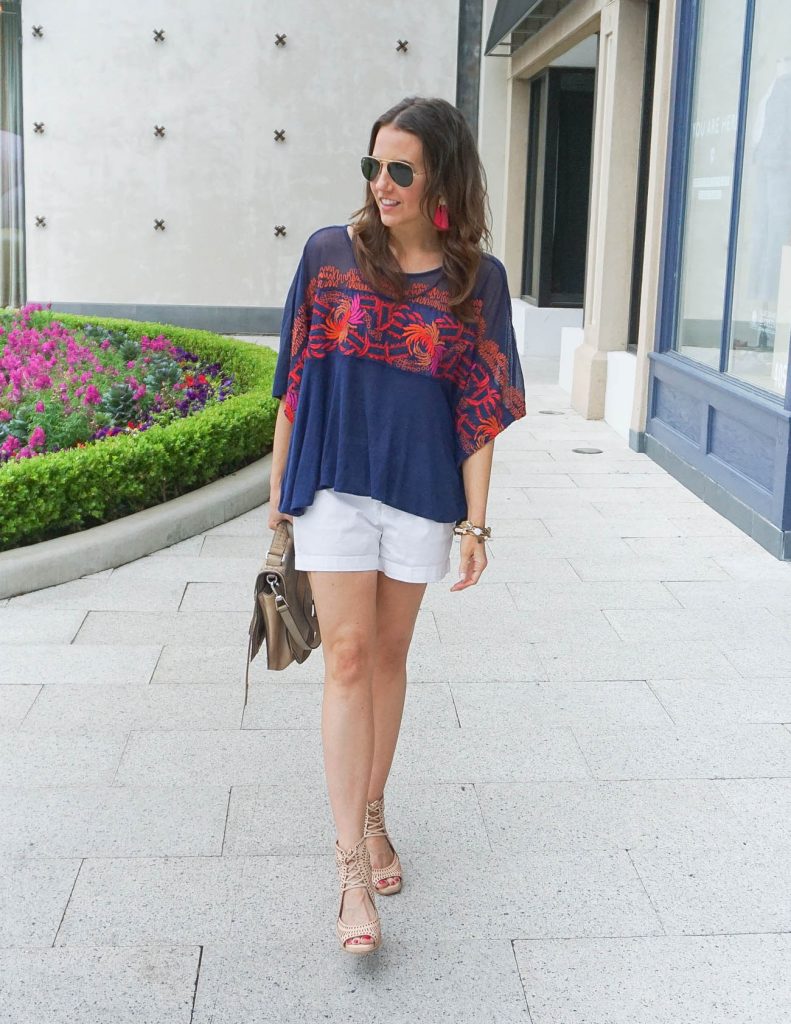
Happy Friday!! Our area schools have been on Spring Break which means I have seen lots of beach and pool pics flooding my social media feeds. We had perfect Spring Break weather and are starting to have 80 degree days! It’s supposed to rain this weekend, but I’m hoping it will take a small break because I kind of want to lay by the pool for a bit.
It also means it is time to start dusting off my shorts. I purchased these white cotton shorts from Old Navy a couple years ago, and I still love them. I don’t like to spend too much on shorts because I feel like I don’t wear them as much as jeans and dresses. Although, the fact that our winter was really short here makes me think we are going to have a really hot summer, so I may buy a few new pairs this year.
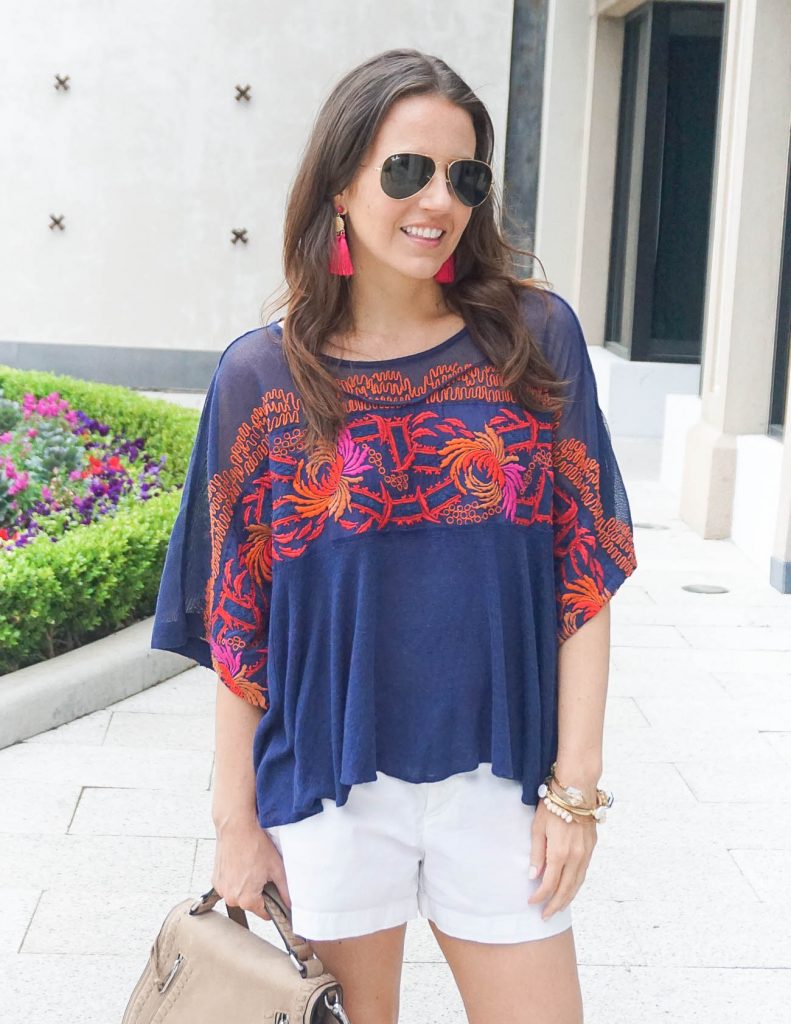
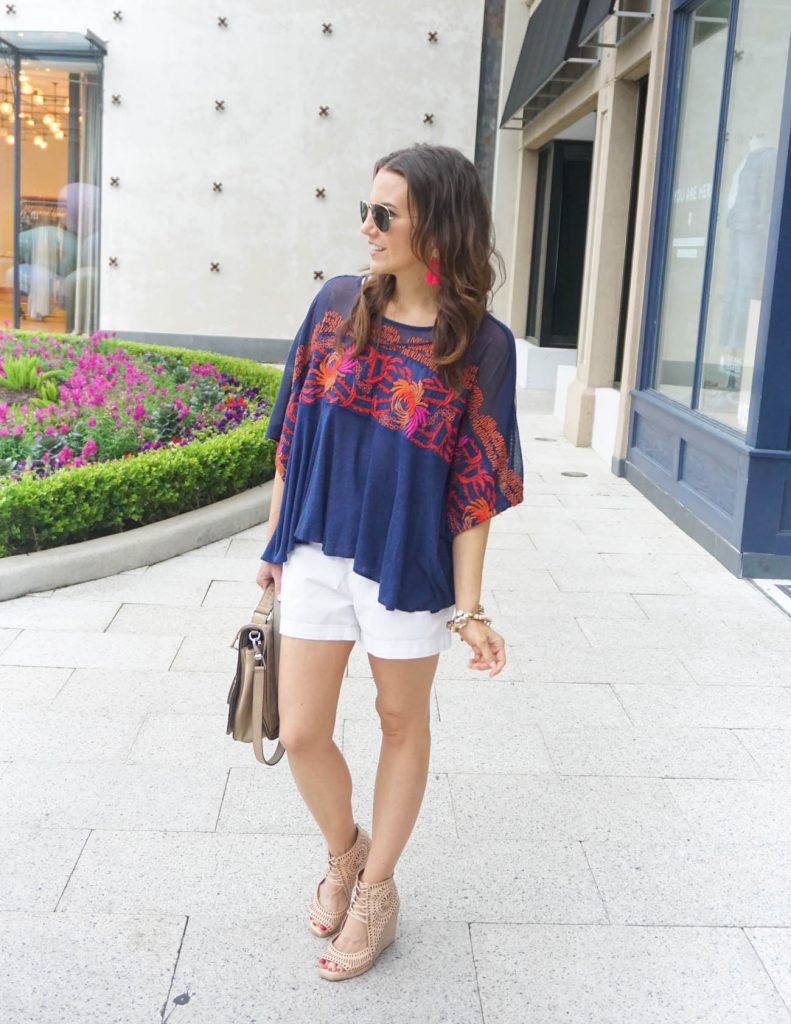
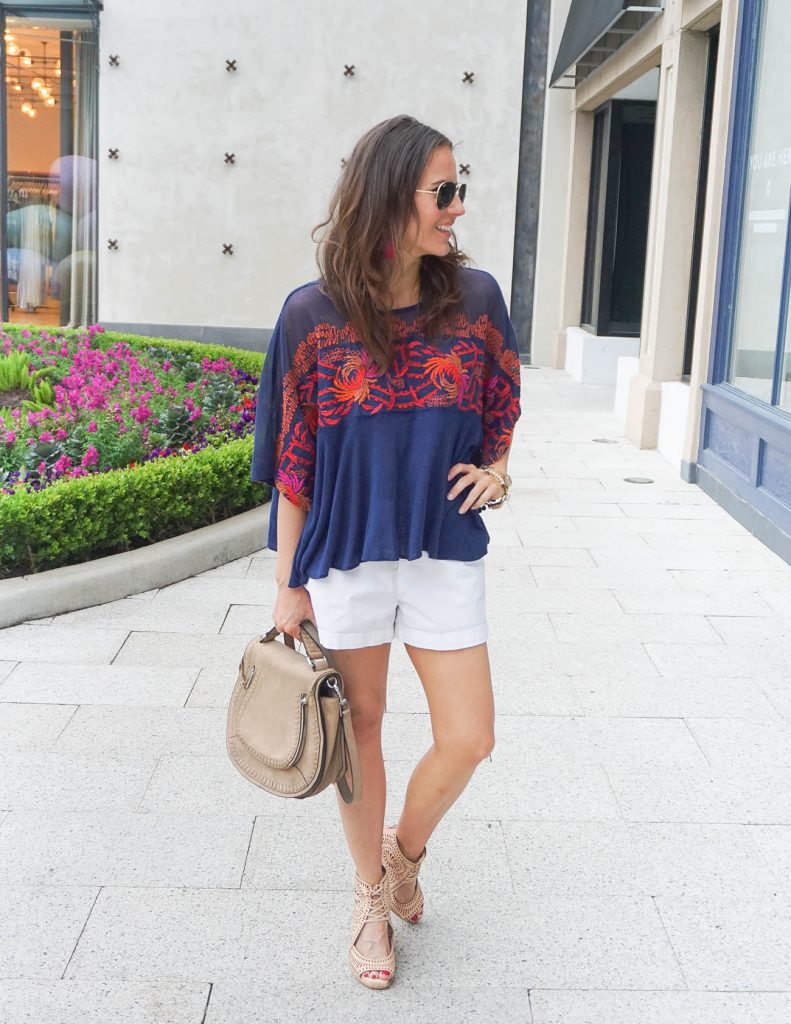
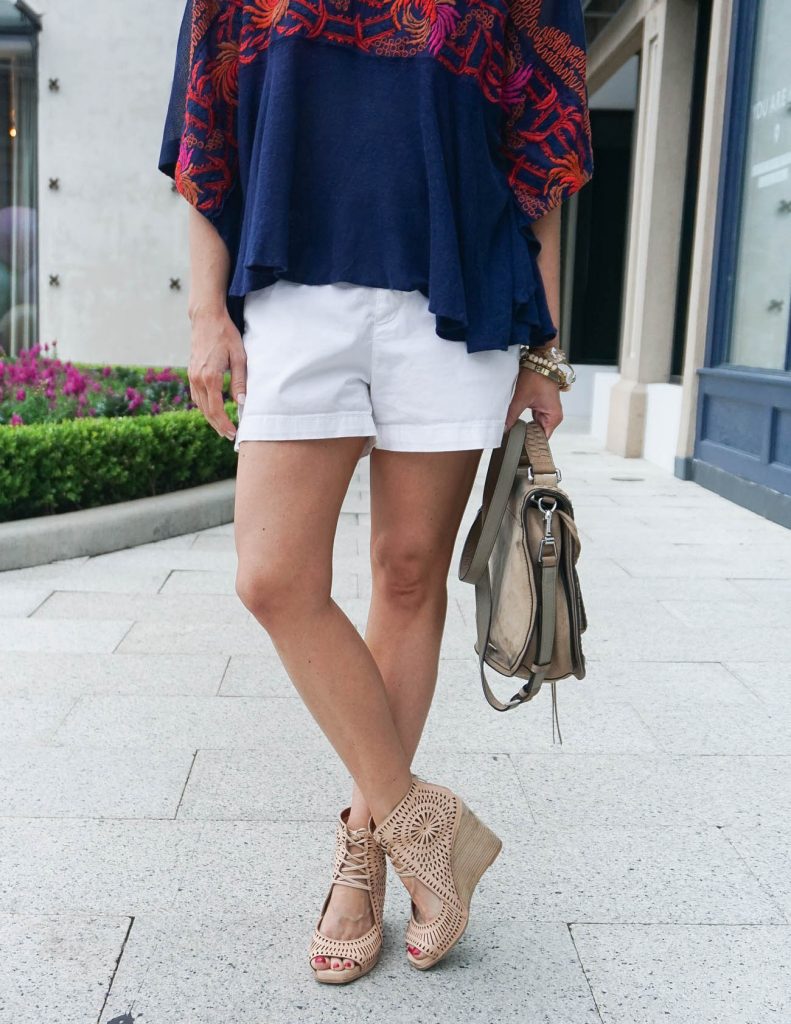
For what to wear with white shorts, I lean towards dark or bright color pairings. These colors really pop against the white. I love that this top incorporates both of those. It’s also super flowy which is great for keeping cool on hot days. With shorts, I tend to opt for either wedges or a flat sandal. I like to go with neutral options to help elongate the look of my leg. The wedge can also help make your leg look a little leaner too.
Another style idea for white shorts, go neutral with a fitted white tank or tee. You can add in pops of color with your accessories, or go all gold for a dressier look. Size note on this top, it runs big in my opinion, I sized down to an XS.
I hope y’all have a wonderful weekend, and I will see you back here next week when I will share my current spring obsession! See you then.
| OUTFIT DETAILS |
Navy Embroidered Tee | White Shorts | Similar Wedge Sandals | Vanity Saddle Bag | c/o Pink Tassel Earrings | Bourbon & Bowties Bracelets (similar) | Rayban Aviators | Nails: Essie Limo-scene

SHOP THE LOOK
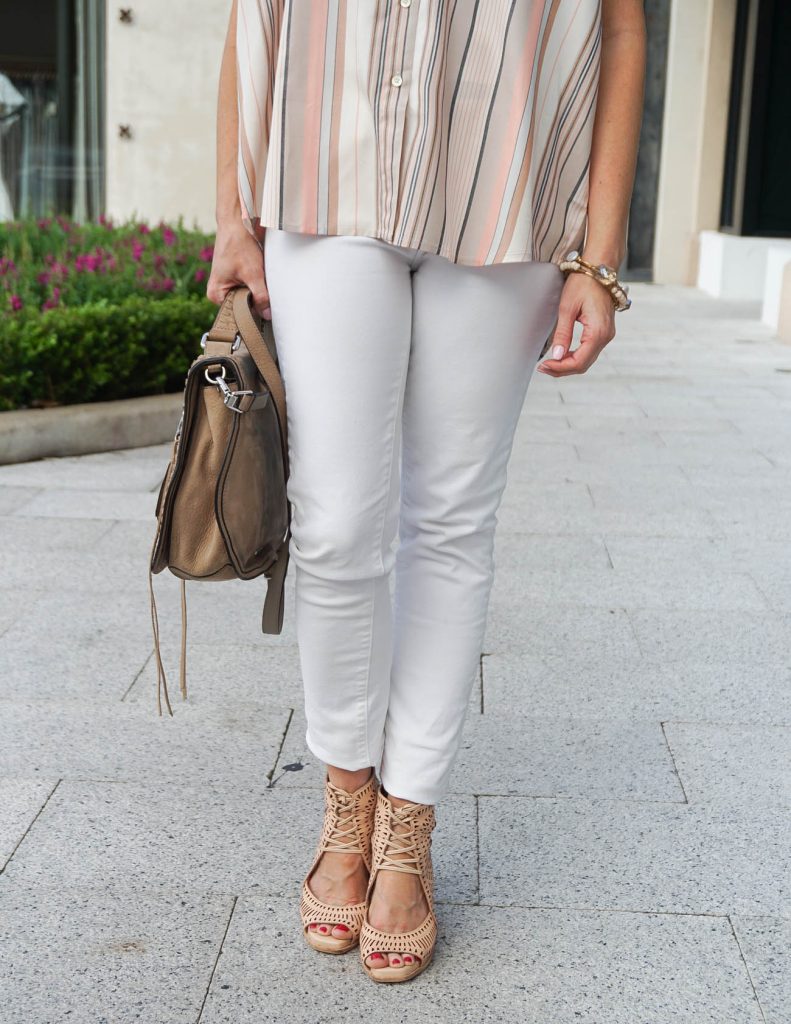
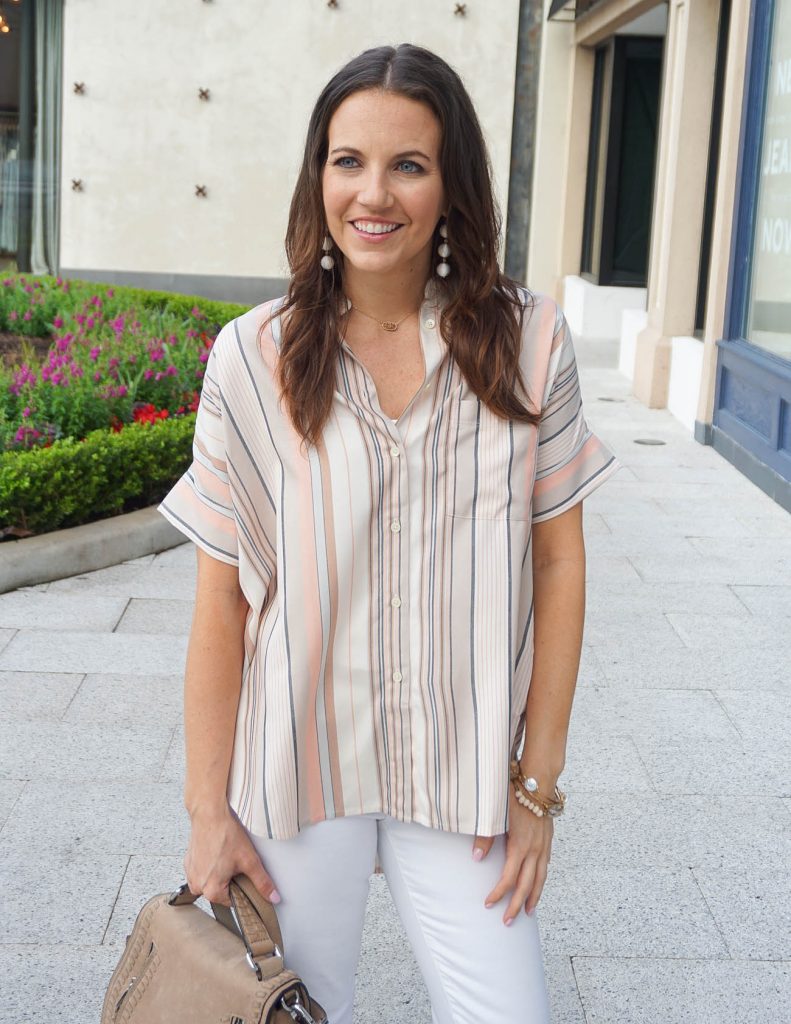
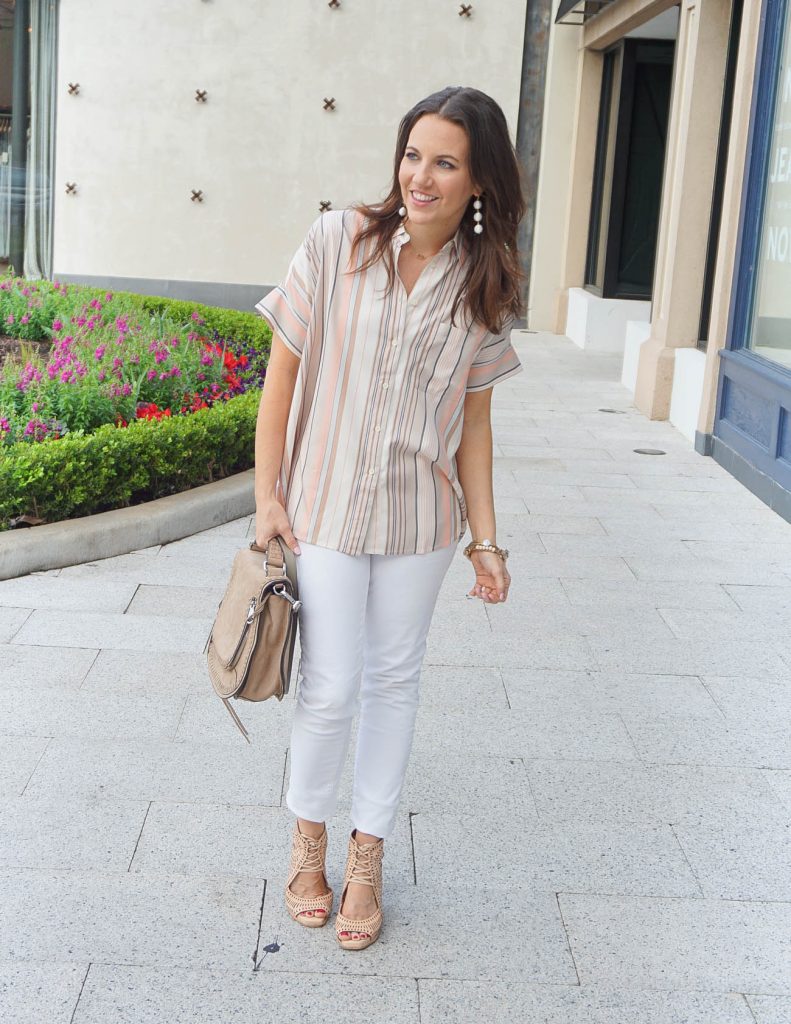
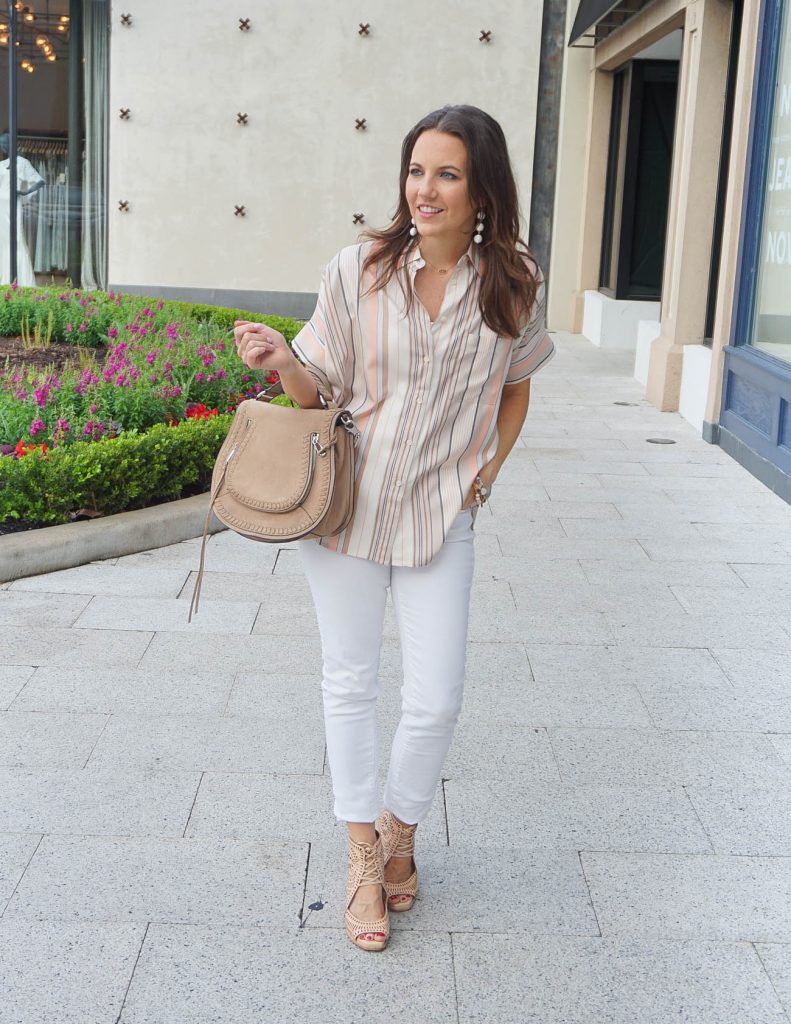
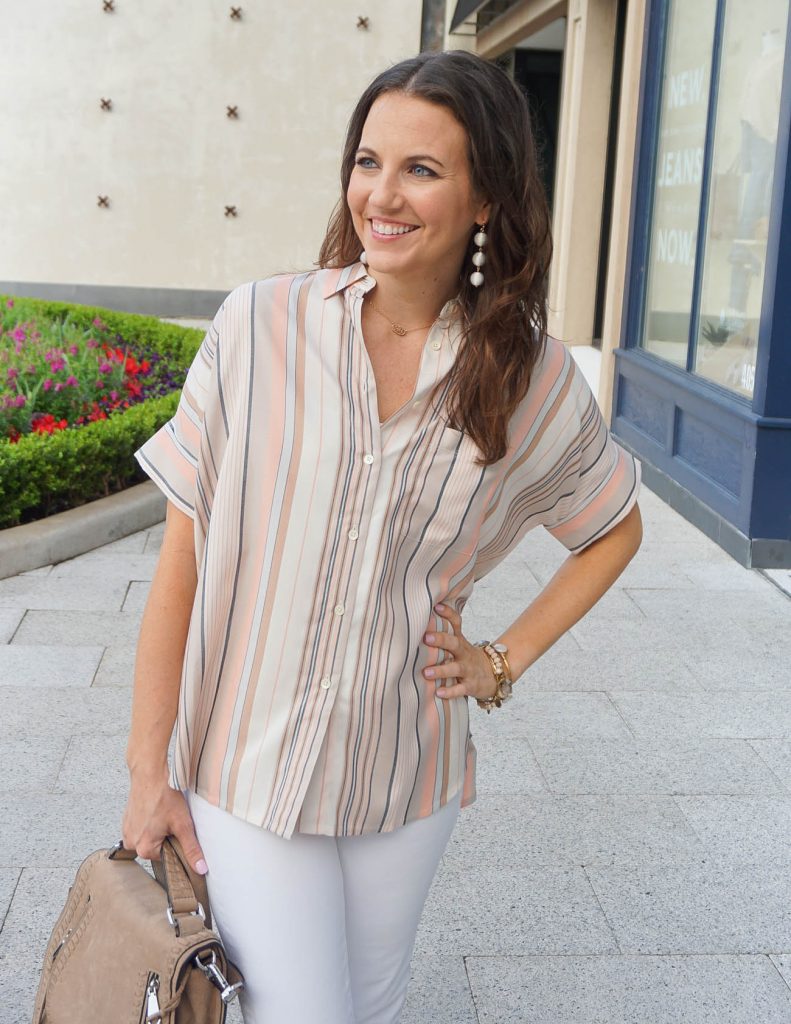
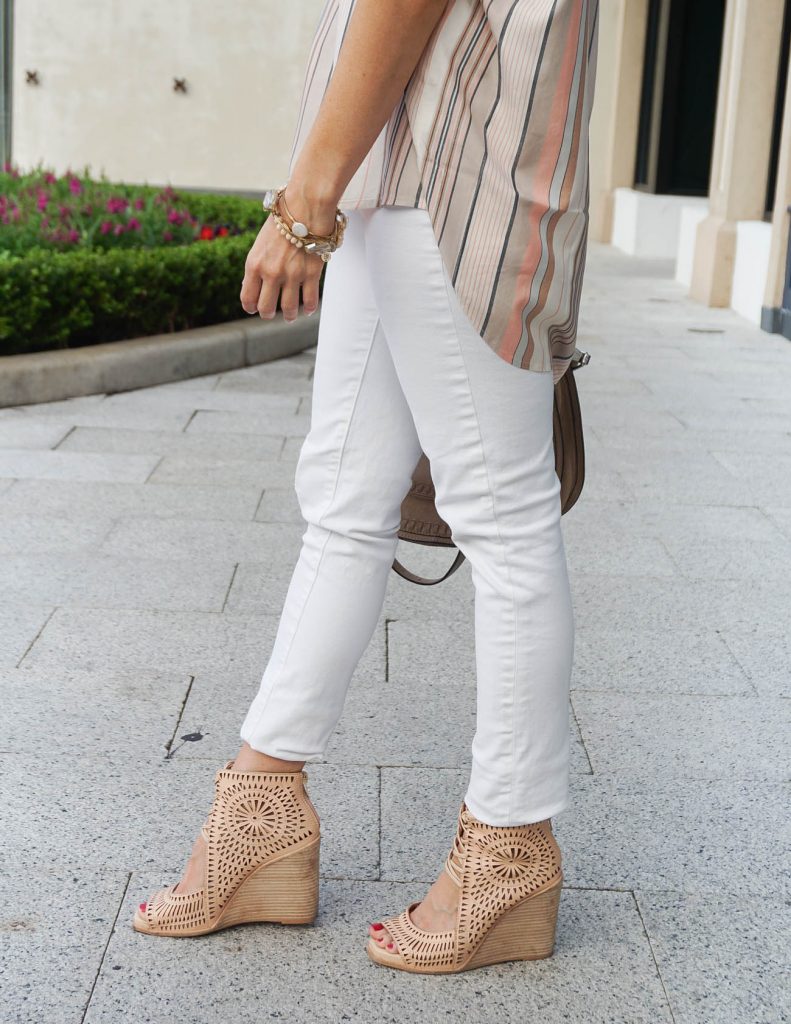
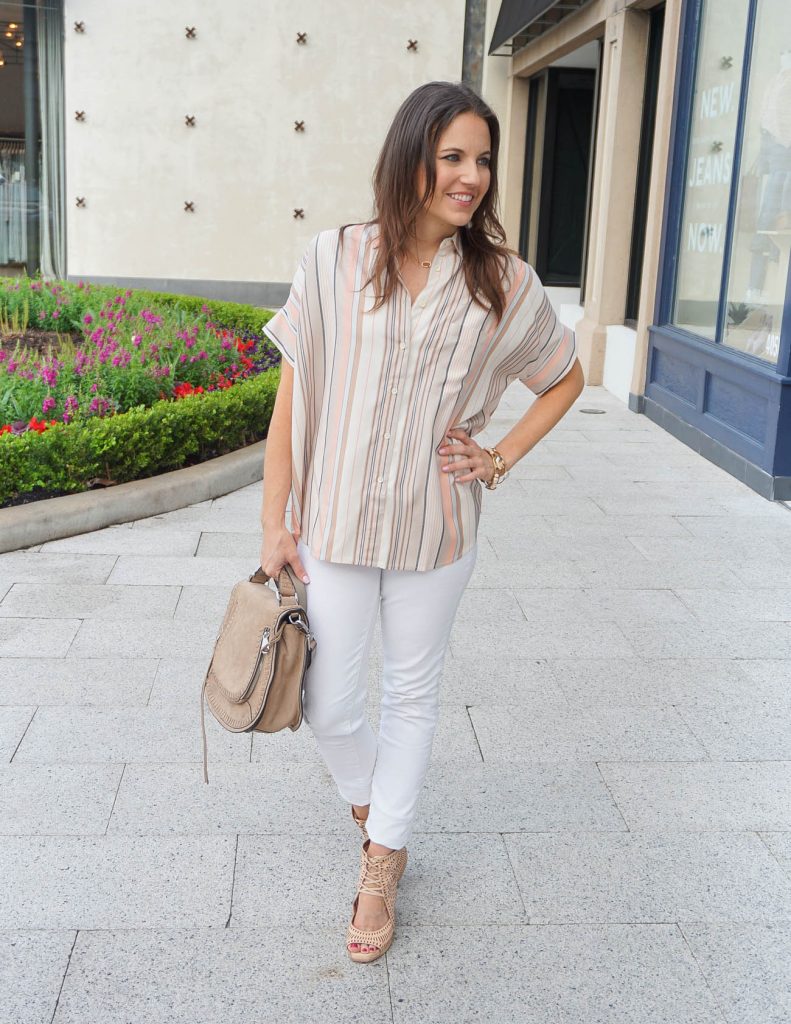
Perfect Striped Top for Spring
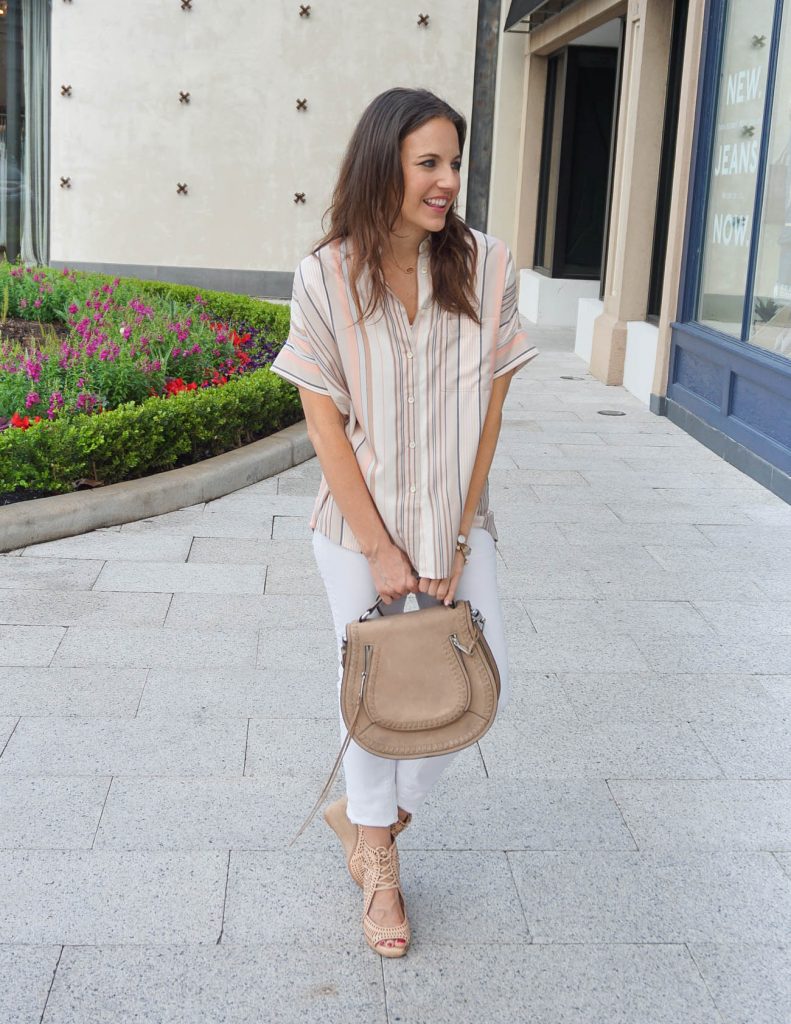
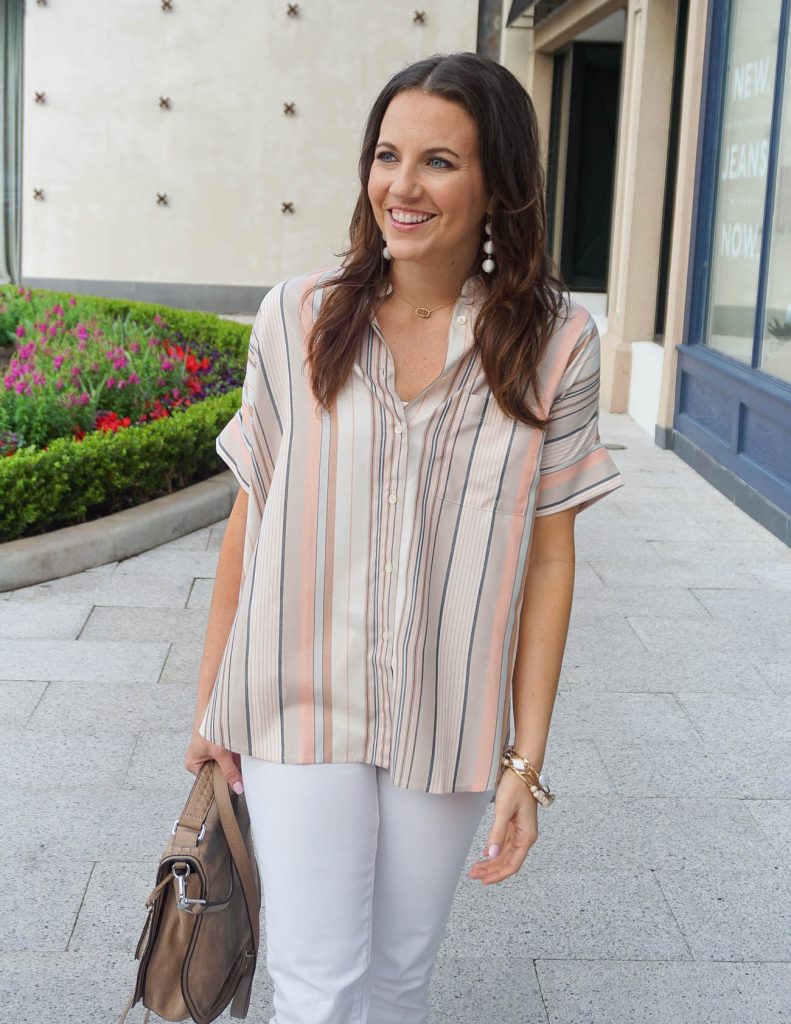
Good Morning! How was your weekend? I met up with my 5 best friends for dinner and girl talk this weekend. It was so needed and so much fun! My gal pals and I all live in the Houston area, but not all close by. Some of them live a good hour drive away. We try and get together a few times a year to catch up in person. Each time it feels as if no time has passed since we last saw each other. I always think that is one of the most special kinds of friendship!
I’m so in love with this top for Spring. The beautiful pastel colors of the stripes make my heart happy. I feel like my wardrobe was very gray and black during winter, so I’m definitely embracing some color this season. I love pairing the lighter pastel colors with white jeans and a neutral shoe. I think both compliment the lighter palette well and help the color stand out. This top is meant to be oversized. I sized down to an XS to have a slightly more fitted look. The boxy design still makes it look and feel slightly oversized even with the sizing down.
I hope ya’ll have a great week, and don’t forget to share your outfit inspiration in the link up at the end of the post!
| OUTFIT DETAILS |
Striped Top | White Jeans | Similar Wedges | Vanity Saddle Bag | c/o White Ball Earrings | c/o Elisa Necklace | Bourbon & Bowties Bracelets (similar) | Nails: Essie Minimalistic
SHOP THE LOOK
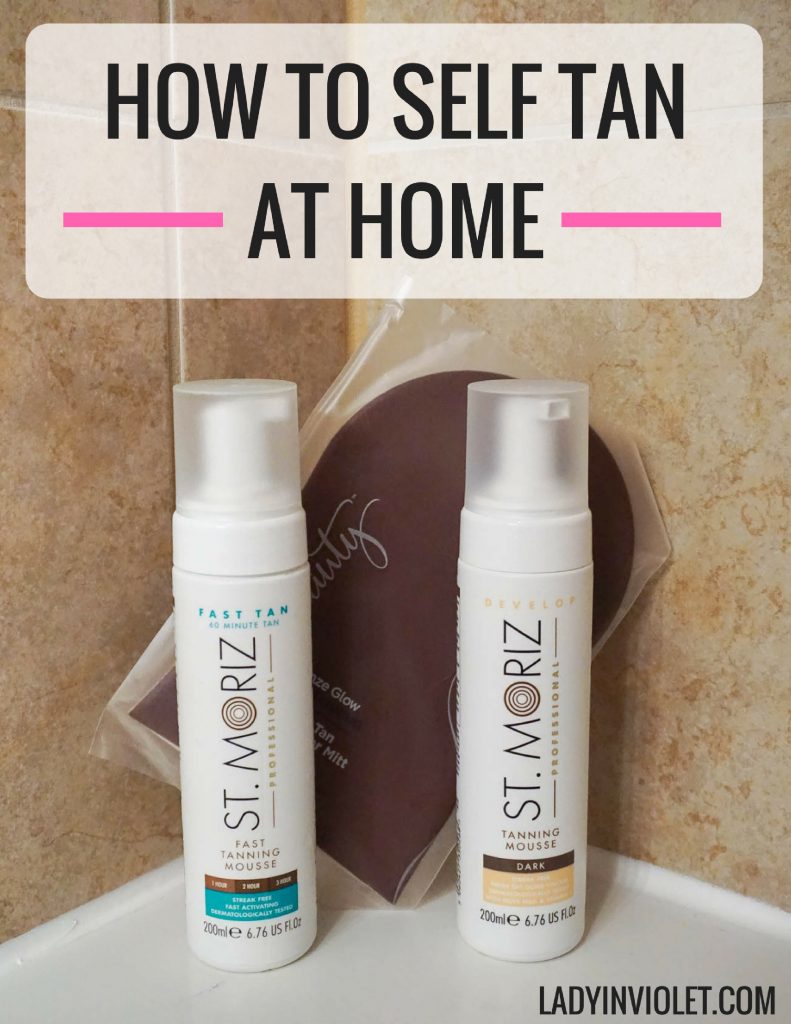
How to Self Tan at Home

I have always loved a good tan. In college, I could spend hours by the pool building the perfect tan every summer. These days I opt for a bit of a safer and less time consuming option with self tanners. I have been experimented with an array of self tanning methods. I tried the misting booths when they first came out, but I came out looking a little orangey and the tan faded weird. I hear they are much better now, but I haven’t tried them recently. I also tried the airbrushing method. You know stand naked in front of someone while they airbrush the tan on you. I loved this and it looked natural, but I found the tan to be very sensitive and expensive at $40-50 per tan. You had to be so careful in the shower or you could mess up the tan with your loofah.
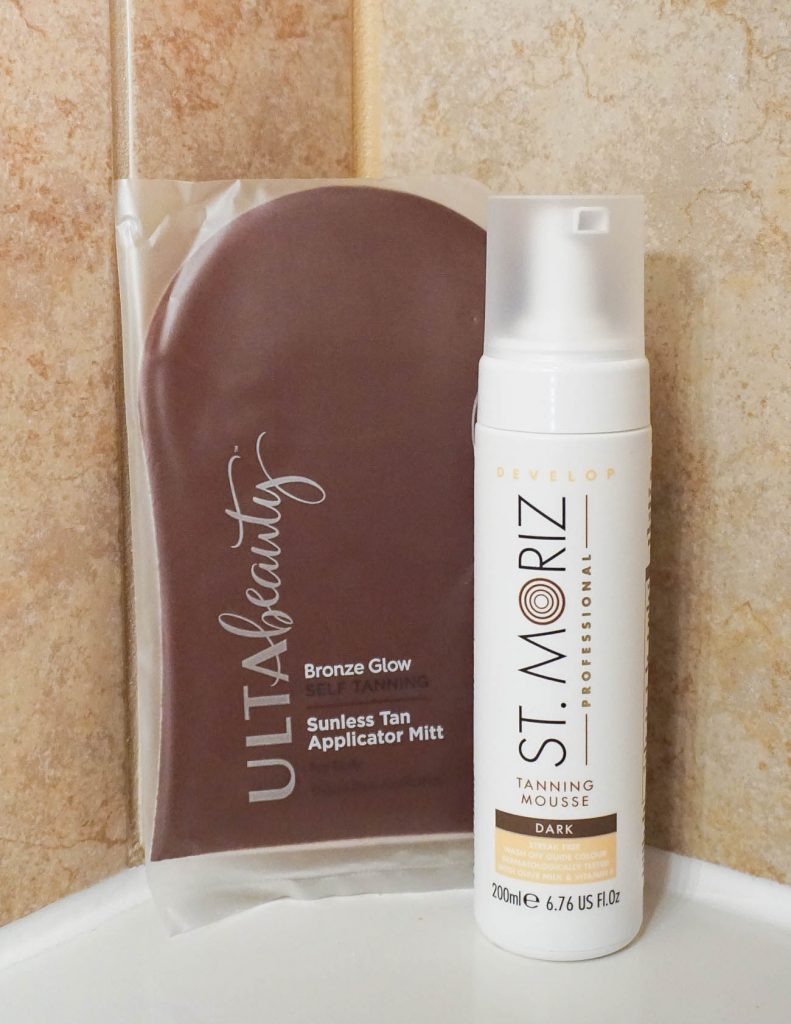
A couple years ago, a friend introduced me to St. Moriz and it was a game changer. I have tried a couple other brands, but I always come back to St. Moriz for several reasons. One – it’s an affordable option, two- it has a very natural look, and three – no streaking or weird fading issues. Side Note- If you are at the end of the bottle, you may experience a spotty application. I recommend tossing the bottle and starting with a new one immediately.
I wear this self tanner in all my blog photos, so check around on my last post to see how it looks on me. I usually tan the night before I shoot, so my tan is fresh. I use the dark shade. I originally started with Medium, but I found it’s pretty light. Since I have been using this product for so long, I wanted to share some of my tips and steps on how to self tan at home based on what I have learned throughout the years of using this product.
Let’s start with the steps to self tan at home. The whole process is actually pretty quick and takes me about 15 minutes.
STEP ONE – Exfoliate – I use an exfoliating body wash in the shower to scrub off dry skin. Give a little extra attention to your elbows, knees, and heels. After my shower, I don’t apply anything on my skin and let it dry before moving on to the next step.
STEP TWO – Tan – I lay down a dark towel on the floor to prevent staining the floor or a bath mat. I use the large sunless tanning mitt to apply the mouse over my entire body. I start at my legs and move up. I do my face last and use the mini face mitt. Make sure to apply all the way into your hairline. I apply 1-2 pumps of the mousse on the mitt, swipe the area, and then smooth with circular motions. You immediately start seeing the guide color so you can see where you applied. I like these mitts because the color does not bleed through them and over stain your hands. I rinse them and reuse a few times before tossing them out.
STEP THREE – Wait – I mainly use the DEVELOP mousse which I find needs 8 hours to give me the color I want. I apply the mousse at night and then head to bed. You can’t get your tan wet while it sets, and sleeping is the best way to kill the 8 hour wait. If you are short on time, I recommend the FAST TAN mousse. I usually leave it on for 3 hours to achieve my normal dark tan results. I once fell asleep on accident and left it on for about 5 or 6 hours and it had a slightly orange tone.
STEP FOUR – Shower Off – Once your tan is set, head to the shower to rinse off the excess color. You will be much tanner before the shower. I always feel like I look dirty, and then everything looks perfect and even post shower. I rinse until the water runs clear and then pat dry.
STEP FIVE – Enjoy!
I typically apply my tan once a week. If I want a consistently dark tan, I will apply every 4 days. The tan fades very naturally for me, no spotting or splotchy issues.
With self tanning, you will come to learn a few thing through trial and error. Here are a few of my top tips for the perfect tan.
1 – Do not shave before you tan. I prefer to shave after I tan, sometimes right after I rinse off. I will also shave the day before I tan. If you shave right before, the color may set in the open hair follicles.
2 – Do not apply deodorant before you tan. Your skin needs to be 100% clean. Applying deodorant could affect the color of your tan at your underarms.
3 – You will sweat off the color. If you have a sweat heavy workout like spin class, do not tan the night before. Every time you wipe the sweat off your face, the tan will wipe off too. I have never had a major issue with clothes staining, but I did wear a white dress outdoors for several hours in 100 degree weather. I sweat a lot and the color came off at the underarm area. The color did wash out of the dress.
4 – Do not apply mousse directly to your hands and feet. These are the hardest parts to tan!!! I usually use the mouse built up in the mitt and wipe over my hands and feet for the most natural not crazy dark look. This one you just have to trial and error to see where you need to be more mindful. I tend to miss the inside arches of my feet and my fingers. I lightly rinse my hands when I’m done. I use a towel to wipe the insides of my hands and inner wrists where I tend to get accidental color.
5 – Do not get wet. Be careful to not splash water on you as the splashed area may streak.
6 – While I’m sitting or sleeping in my self tanner, I wear dark loose fitting clothing. I don’t want anything tight to rub off the color. Also, I have never had the guide color come off on my sheets.
7 – Post tan, keep your skin hydrated with lotion to lengthen the life of your tan.
8 – Nail Polish Remover will remove your tan. If you are wanting to change your color take your nail polish off before your tan to prevent some awkward looking toes and fingers.
9- GO SLOW! Do not rush applying your tanner. Going to fast could mean missing a spot. Go slow, pay attention, and make sure you hit every area.
I feel like I could go on and on about all my trial and error, but those are the BIG ones I have to pass on. Ya’ll I cannot say enough great things about this self tanner. If you are like me and love being tan, but do not have the time to sit in the sun all day, definitely consider the self tanning option. If you have any questions, leave me a comment and I will answer them!
| TANNING PRODUCTS |
St. Moriz Develop Tanning Mousse | St. Moriz Fast Tan Tanning Mousse | Ulta Tanning Mit | Ulta Face Tanning Mit | St. Ives Exfoliating Body Wash
SHOP THE PRODUCTS