
I have always loved a good tan. In college, I could spend hours by the pool building the perfect tan every summer. These days I opt for a bit of a safer and less time consuming option with self tanners. I have been experimented with an array of self tanning methods. I tried the misting booths when they first came out, but I came out looking a little orangey and the tan faded weird. I hear they are much better now, but I haven’t tried them recently. I also tried the airbrushing method. You know stand naked in front of someone while they airbrush the tan on you. I loved this and it looked natural, but I found the tan to be very sensitive and expensive at $40-50 per tan. You had to be so careful in the shower or you could mess up the tan with your loofah.
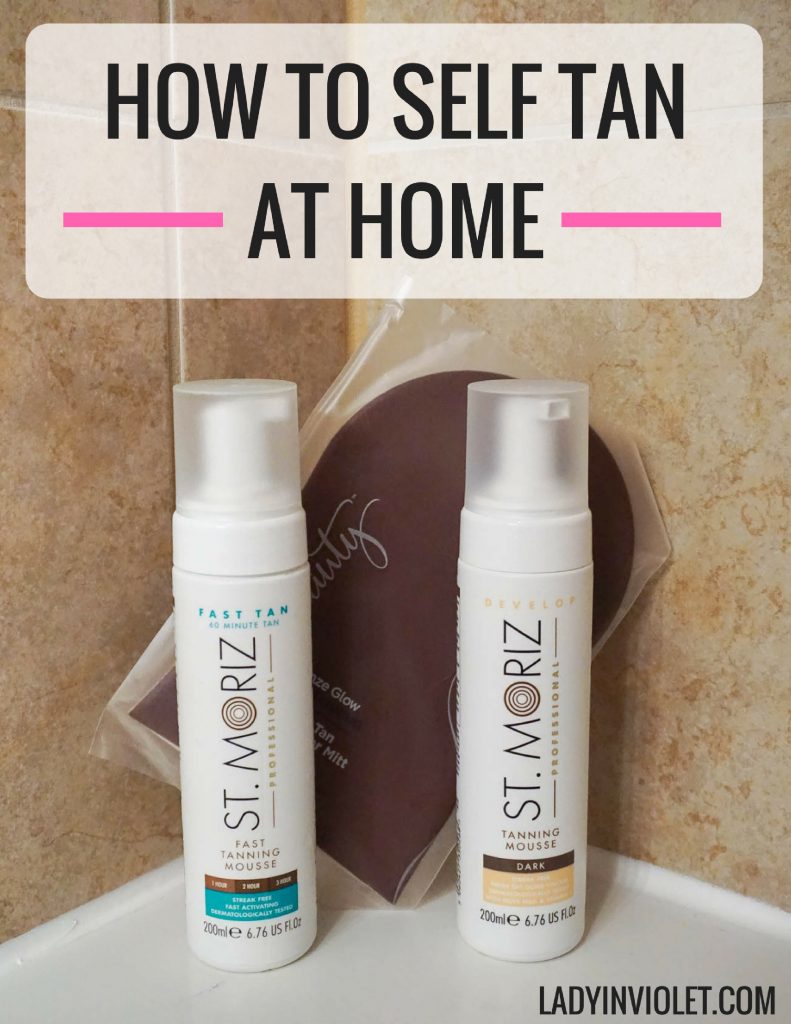
A couple years ago, a friend introduced me to St. Moriz and it was a game changer. I have tried a couple other brands, but I always come back to St. Moriz for several reasons. One – it’s an affordable option, two- it has a very natural look, and three – no streaking or weird fading issues. Side Note- If you are at the end of the bottle, you may experience a spotty application. I recommend tossing the bottle and starting with a new one immediately.
I wear this self tanner in all my blog photos, so check around on my last post to see how it looks on me. I usually tan the night before I shoot, so my tan is fresh. I use the dark shade. I originally started with Medium, but I found it’s pretty light. Since I have been using this product for so long, I wanted to share some of my tips and steps on how to self tan at home based on what I have learned throughout the years of using this product.
Let’s start with the steps to self tan at home. The whole process is actually pretty quick and takes me about 15 minutes.
STEP ONE – Exfoliate – I use an exfoliating body wash in the shower to scrub off dry skin. Give a little extra attention to your elbows, knees, and heels. After my shower, I don’t apply anything on my skin and let it dry before moving on to the next step.
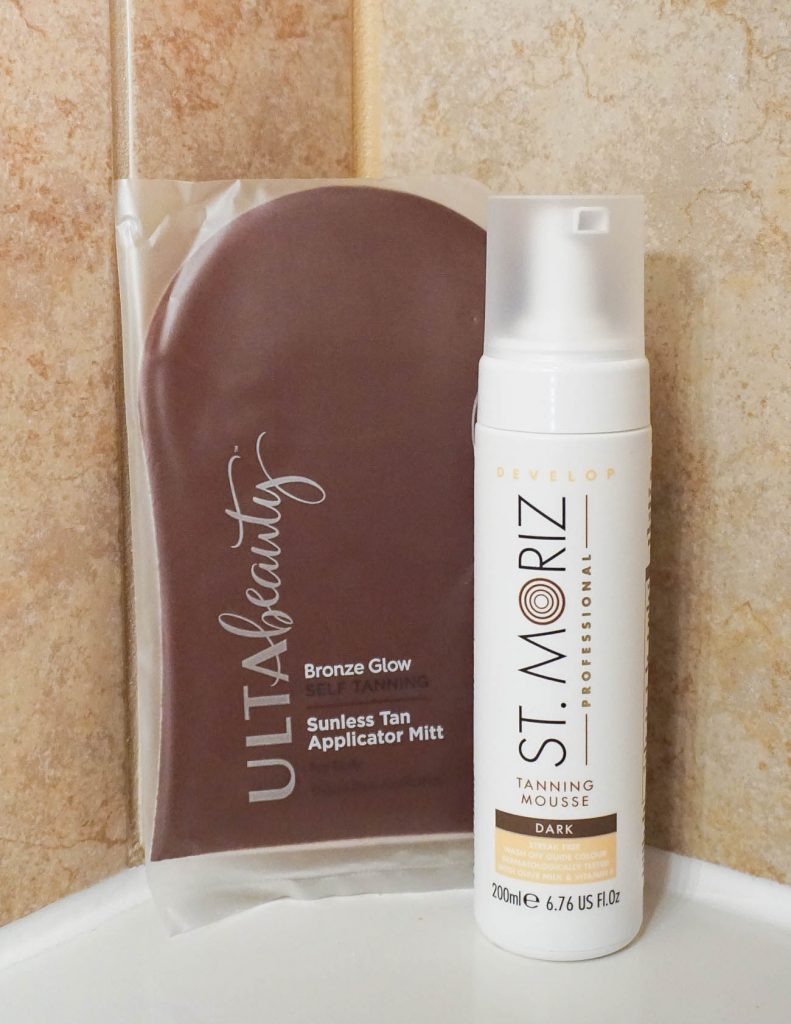
STEP TWO – Tan – I lay down a dark towel on the floor to prevent staining the floor or a bath mat. I use the large sunless tanning mitt to apply the mouse over my entire body. I start at my legs and move up. I do my face last and use the mini face mitt. Make sure to apply all the way into your hairline. I apply 1-2 pumps of the mousse on the mitt, swipe the area, and then smooth with circular motions. You immediately start seeing the guide color so you can see where you applied. I like these mitts because the color does not bleed through them and over stain your hands. I rinse them and reuse a few times before tossing them out.
STEP THREE – Wait – I mainly use the DEVELOP mousse which I find needs 8 hours to give me the color I want. I apply the mousse at night and then head to bed. You can’t get your tan wet while it sets, and sleeping is the best way to kill the 8 hour wait. If you are short on time, I recommend the FAST TAN mousse. I usually leave it on for 3 hours to achieve my normal dark tan results. I once fell asleep on accident and left it on for about 5 or 6 hours and it had a slightly orange tone.
STEP FOUR – Shower Off – Once your tan is set, head to the shower to rinse off the excess color. You will be much tanner before the shower. I always feel like I look dirty, and then everything looks perfect and even post shower. I rinse until the water runs clear and then pat dry.
STEP FIVE – Enjoy!
I typically apply my tan once a week. If I want a consistently dark tan, I will apply every 4 days. The tan fades very naturally for me, no spotting or splotchy issues.
With self tanning, you will come to learn a few thing through trial and error. Here are a few of my top tips for the perfect tan.
1 – Do not shave before you tan. I prefer to shave after I tan, sometimes right after I rinse off. I will also shave the day before I tan. If you shave right before, the color may set in the open hair follicles.
2 – Do not apply deodorant before you tan. Your skin needs to be 100% clean. Applying deodorant could affect the color of your tan at your underarms.
3 – You will sweat off the color. If you have a sweat heavy workout like spin class, do not tan the night before. Every time you wipe the sweat off your face, the tan will wipe off too. I have never had a major issue with clothes staining, but I did wear a white dress outdoors for several hours in 100 degree weather. I sweat a lot and the color came off at the underarm area. The color did wash out of the dress.
4 – Do not apply mousse directly to your hands and feet. These are the hardest parts to tan!!! I usually use the mouse built up in the mitt and wipe over my hands and feet for the most natural not crazy dark look. This one you just have to trial and error to see where you need to be more mindful. I tend to miss the inside arches of my feet and my fingers. I lightly rinse my hands when I’m done. I use a towel to wipe the insides of my hands and inner wrists where I tend to get accidental color.
5 – Do not get wet. Be careful to not splash water on you as the splashed area may streak.
6 – While I’m sitting or sleeping in my self tanner, I wear dark loose fitting clothing. I don’t want anything tight to rub off the color. Also, I have never had the guide color come off on my sheets.
7 – Post tan, keep your skin hydrated with lotion to lengthen the life of your tan.
8 – Nail Polish Remover will remove your tan. If you are wanting to change your color take your nail polish off before your tan to prevent some awkward looking toes and fingers.
9- GO SLOW! Do not rush applying your tanner. Going to fast could mean missing a spot. Go slow, pay attention, and make sure you hit every area.
I feel like I could go on and on about all my trial and error, but those are the BIG ones I have to pass on. Ya’ll I cannot say enough great things about this self tanner. If you are like me and love being tan, but do not have the time to sit in the sun all day, definitely consider the self tanning option. If you have any questions, leave me a comment and I will answer them!
| TANNING PRODUCTS |
St. Moriz Develop Tanning Mousse | St. Moriz Fast Tan Tanning Mousse | Ulta Tanning Mit | Ulta Face Tanning Mit | St. Ives Exfoliating Body Wash
SHOP THE PRODUCTS


2 Responses to How to Self Tan at Home